This article explains the different types of food photos we post on our food blogs. Whether they are vertical photos, horizontal photos, square photos or collages, we discuss them all here.
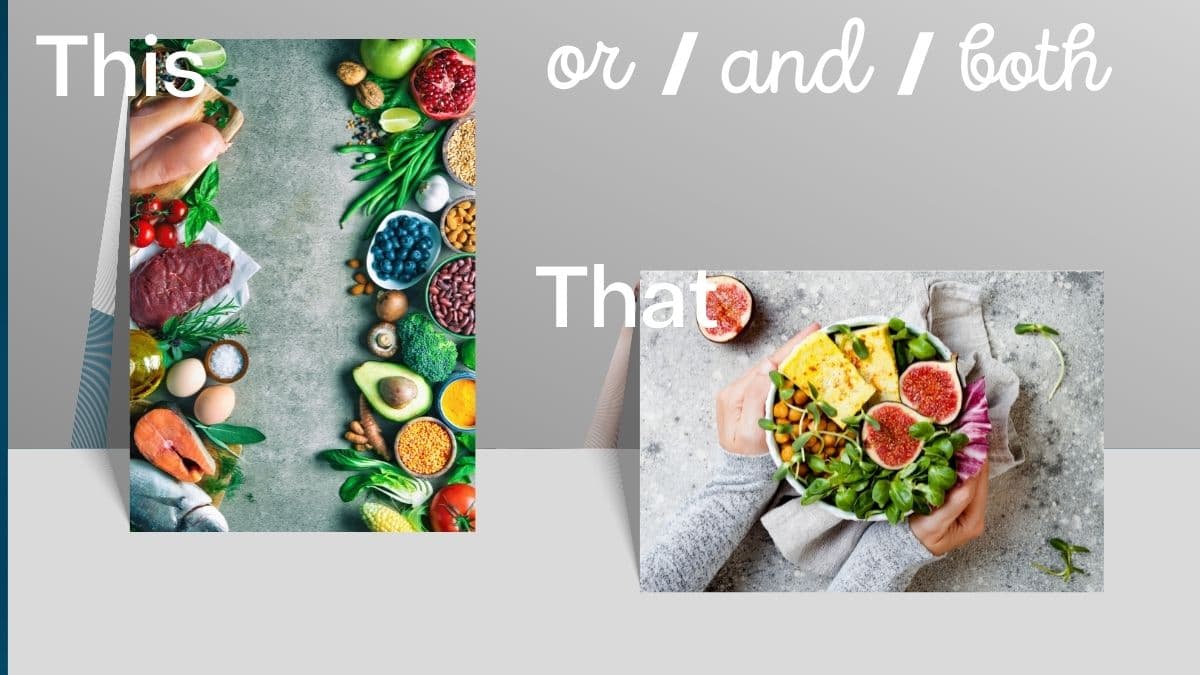
People use many different terms when talking about recipe posts. Unless you have been food blogging for some time, you may be left scratching your head. By sharing here our thoughts about the different photos you should consider taking during your photo shoots, we hope to remove any confusion new food bloggers have about these photo terms.
Hero Image
A hero image (also known as the hero shot) is a full-size photo that is generally presented immediately following the introduction to the post. This photo is not the first thing displayed on a post because Google believes it is a better user experience to see writing before images. For this reason, we place the intro first for better SEO.
We both have different ideas about our hero images. Beth tends to display horizontal photos and Elaine sticks with vertical photos. Choose which is the right orientation for you.
A hero image should not be confused with a featured image, even though they tend to be the same photo, a featured image has a different purpose.
Featured Image
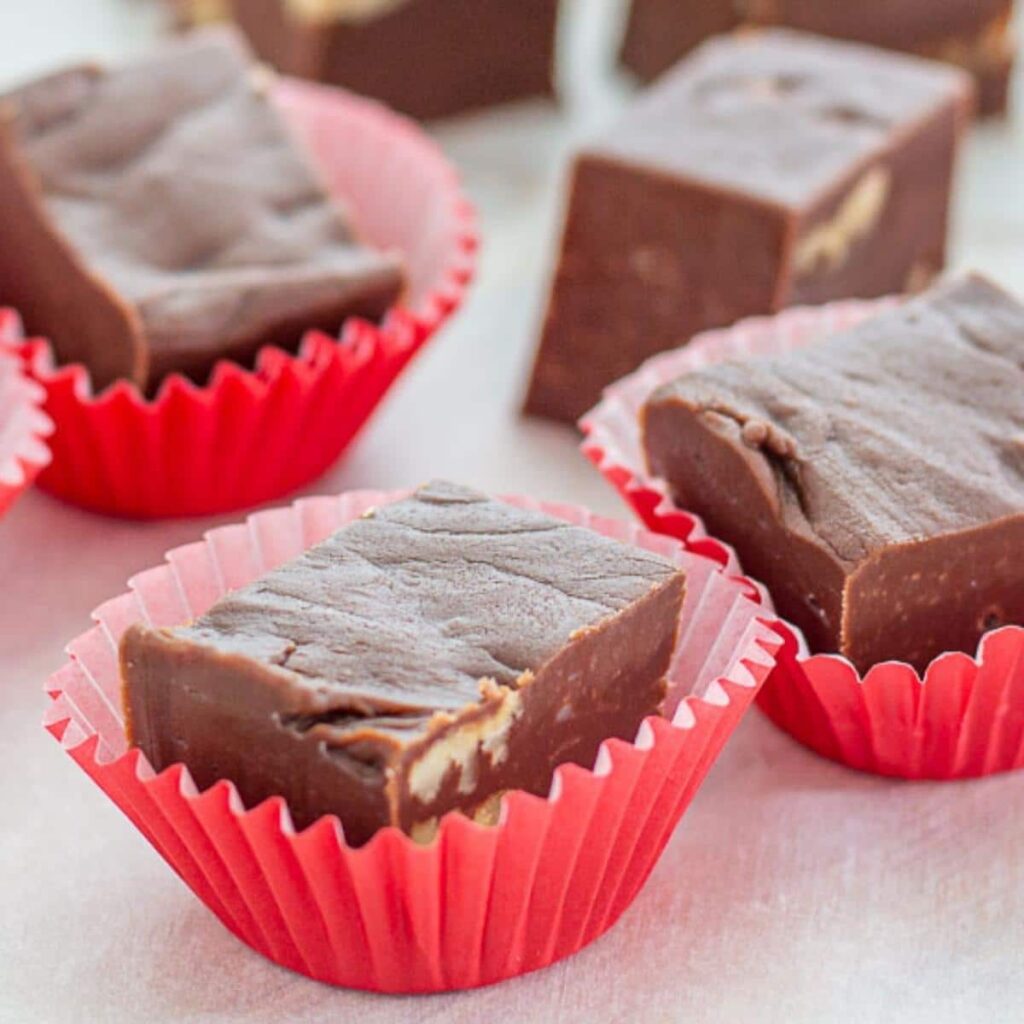
A featured image is the image pulled from your site by Google (and other search engines) to display with rich snippets in search engine results page (SERP) carousels. It is also used by many themes as the photo that will appear on your homepage and on category pages that have been set up to display images.
For Google to pick up your photo in a rich snippet, it should be uploaded into the featured photo section of a blog post in a 1200px by 1200px format. Despite the fact that Google does not display that size photo properly in the SERP carousels, meeting this standard is one of the things that will help get you into one of those prized spots.
Overhead
An overhead shot is from above as the name suggests. This is also known as a flat lay photo.
The only way to get a true overhead or flat lay is to use an overhead rig or have a super-steady hand while you are standing over your layout.
People who don’t have an overhead rig like a c-stand, improvise by standing on a chair to achieve their overhead shots. Others actually have their background and food on the floor and lean over them to get the shot.
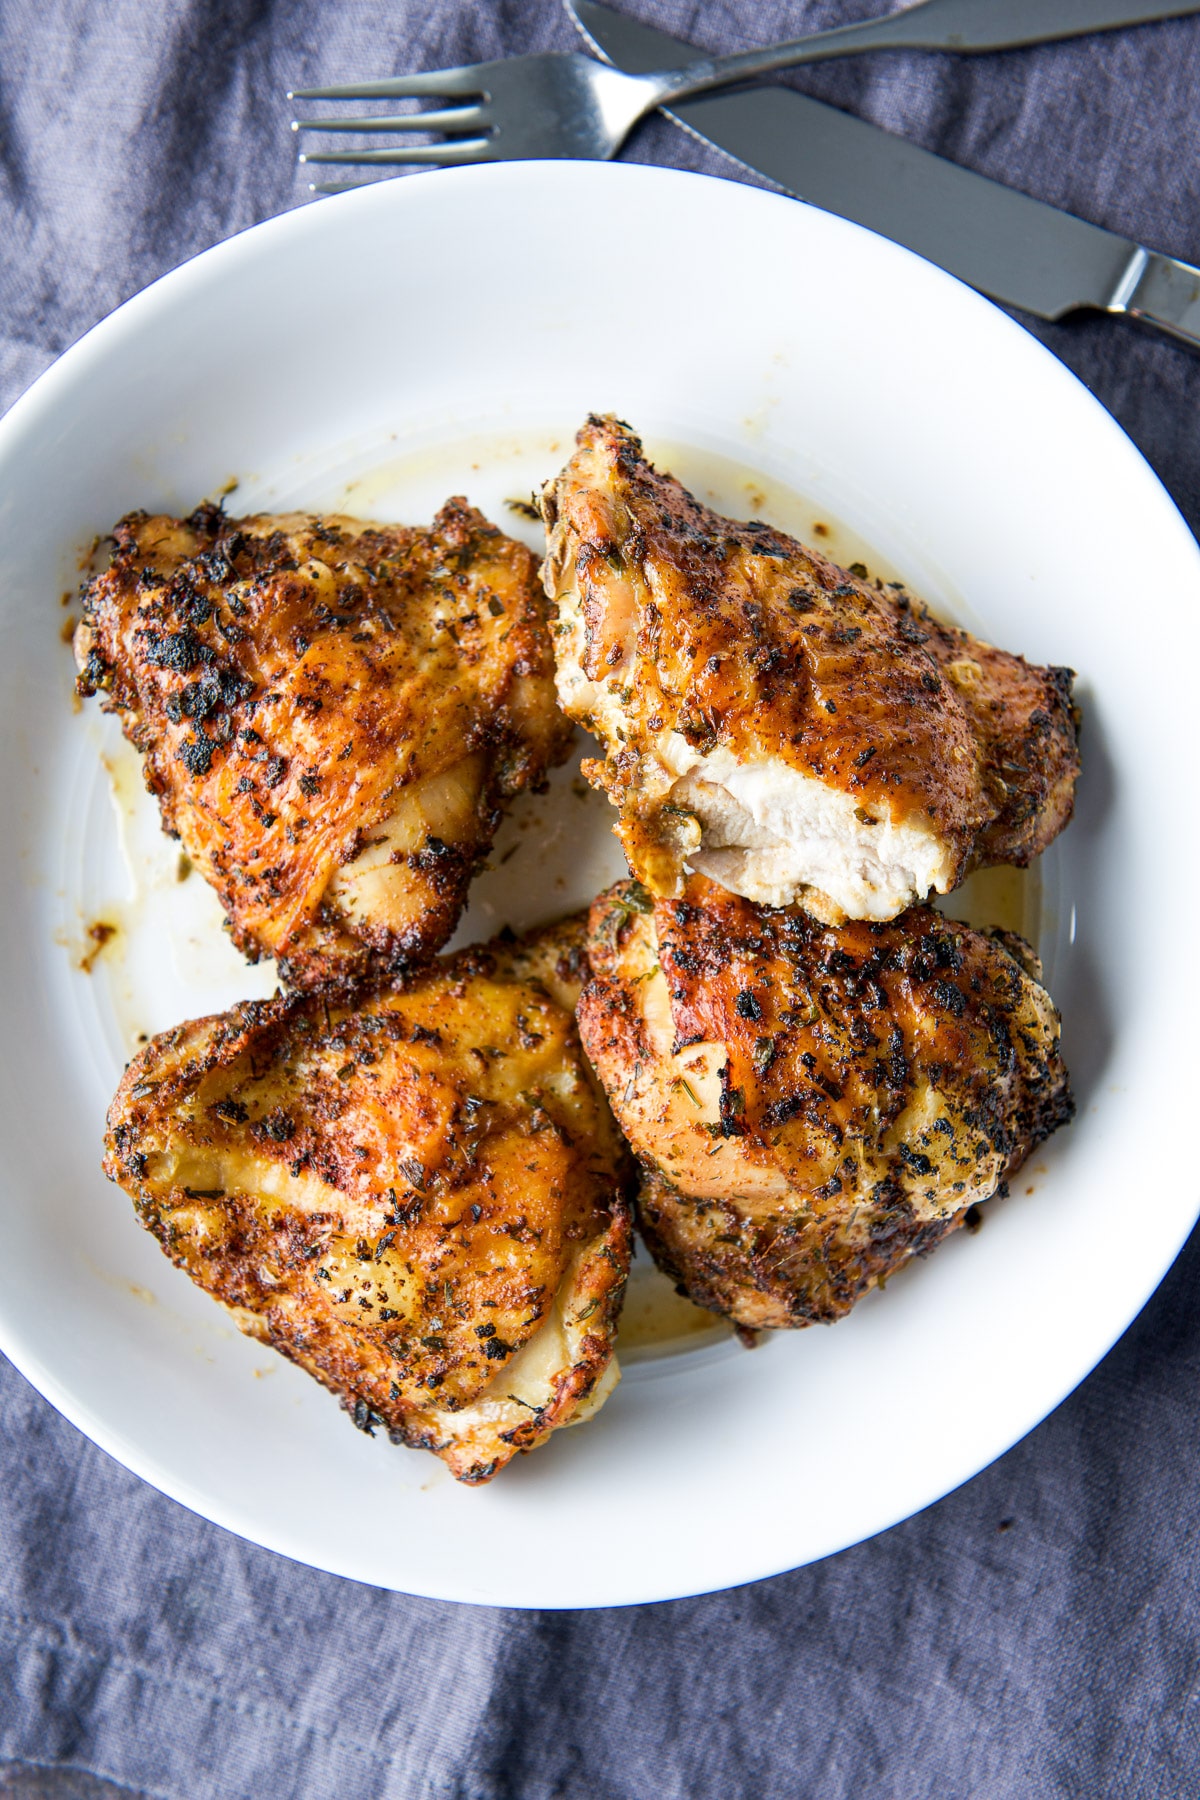
Elaine has a c-stand but in a pinch will stand on a chair, Beth rarely does overhead shots because she doesn’t have an overhead setup. Her photos that appear to be from overhead are not truly from a 90 degree angle. She uses a low coffee table, with her tripod straddling a corner and the tripod head positioned as low as possible without showing the legs of the tripod.
Ingredient Photos
Some of these names are so descriptive that there really isn’t a need to explain what they are.
Ingredient shots can include text overlay or not. Many food bloggers use them and some don’t. Beth used to add text overlay until someone pointed out that text overlay detracts from the photos.
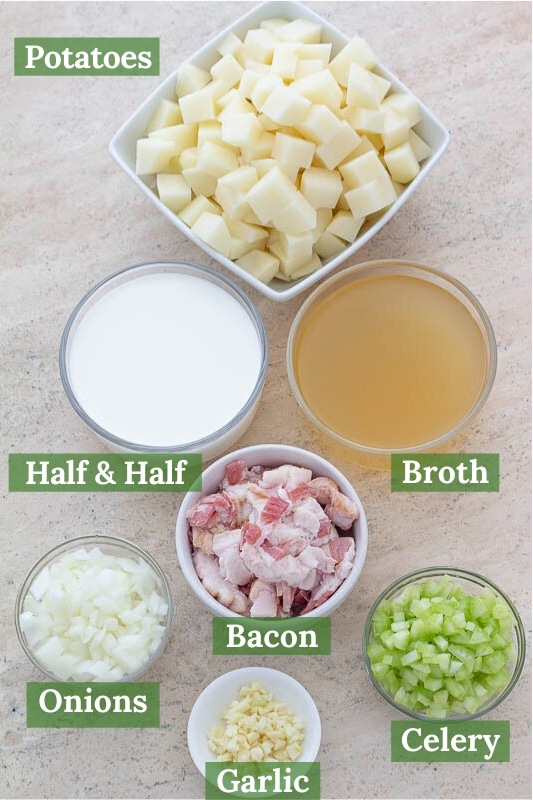
Since Beth spends time working on composition and photo editing, she sees no reason to add the same words to a photo that tend to be included in a bulleted list after the photo anyway.
Elaine normally doesn’t do overhead shots for her ingredient photos. She tends to take 45 degree vertical photos with one of the ingredients in front and in focus, with the other ingredients behind the front one and usually in bokeh.
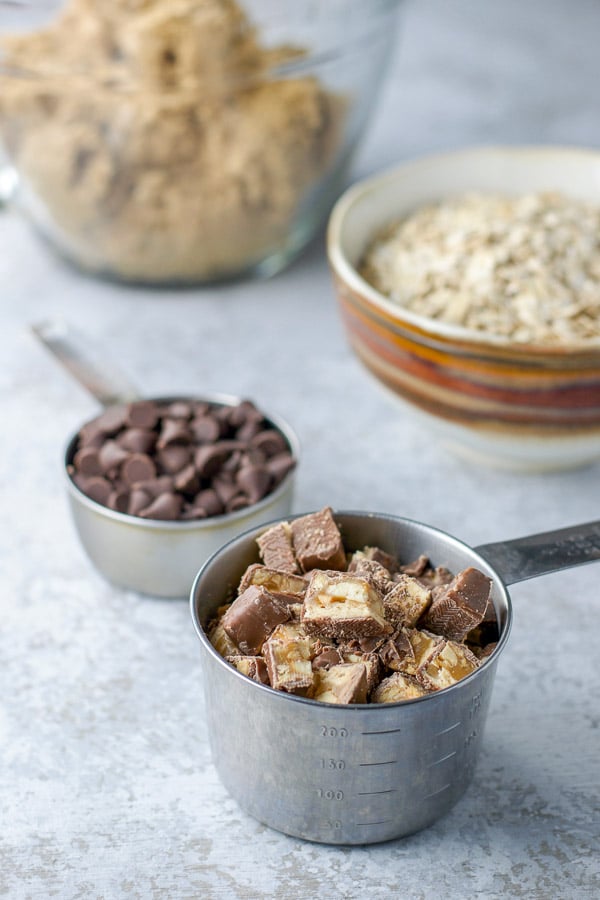
She also doesn’t always have all the ingredients in one shot. Sometimes she separates them according to when they are added or by ingredient type. For instance, if she’s shooting a baked good, she will have the beginning ingredients first – like butter, sugar, eggs, and vanilla. She will then shoot the dry ingredients – like flour, baking soda, etc next.
Process Photos
Process photos are simply the photos that are taken while you are making the recipe. There was a day when most food bloggers only added them to illustrate an important step that needed clarification. Some bloggers still take that approach, and that is okay, but experts do say that process shots are good for user experience.
Elaine has been taking process shots since she started blogging in 2015. When Beth started in 2016, she only provided process shots for steps that were complicated or would benefit from a photo. It was after an audit with Casey Markee that Beth started using a collage of process shots. She has been moving away from collages recently and gone back to her original way of only adding important steps that would benefit from a photo example.
Many bloggers however, especially those whose websites have recently undergone an SEO audit, do use collages for their process shots. Canva is a great place to make those collages. Be sure you change custom settings to make the photo the correct width for your theme and choose an appropriate height.
Canva offers collage templates in many different configurations. They have settings for as few as two inserts and as many as 16. We don’t recommend doing 16. It makes a collage “busy.”
We both usually use our phones to take process shots.
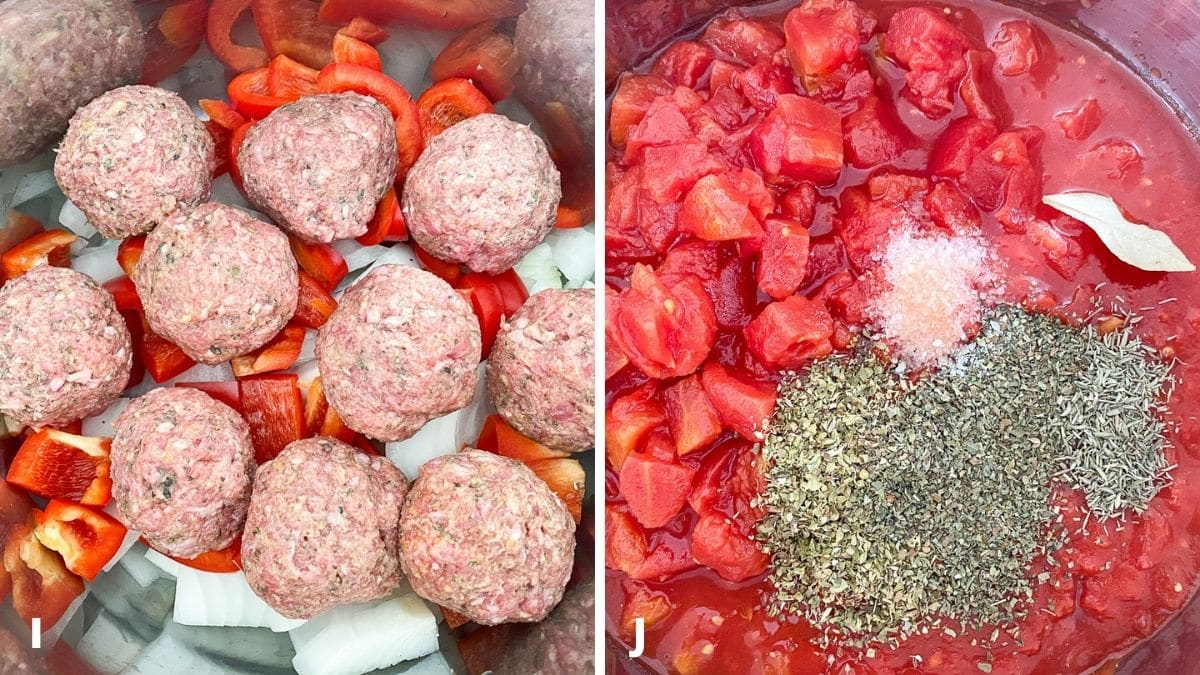
You can number or alphabetize your process shots with overlay text if you’d like and, if you go with that format, reference the text in the directions written into the post. Just remember to indicate in those directions which photos correspond with which step.
Check out this post to see how Elaine does it and this post to see how Beth does it.
When using Canva, once the overlay text has been added, set the new image download quality to 75%. This reduces photo size without sacrificing quality. Don’t skip this step even if you are using a photo compression plugin.
Horizontal
A horizontal photo is a photo that is wider than it is tall. It follows the horizon. The process shot from Elaine in the above section is an example of a horizontal shot. Beth uses mainly horizontal shots for her first hero image.
Vertical
Vertical photos are those that are taller than they are wide. They are good for Pinterest. They do eat up some real estate in a post, so try not to use more than a couple of them. People already complain about the time it takes to scroll through a recipe post.
The majority of Elaine’s photos are vertical. The only exception is the collages she makes in Canva for her process shots.
Pinterest Photos/Pins
Pinterest photos and pins are generally vertical photos. It’s our belief that these photos and pins should be stored on the post page but hidden from view until the user clicks your Pinterest button, when they magically become visible and available. Use a social media plugin like Grow from Mediavine to take advantage of this feature and save significant room on your recipe pages.
Motion
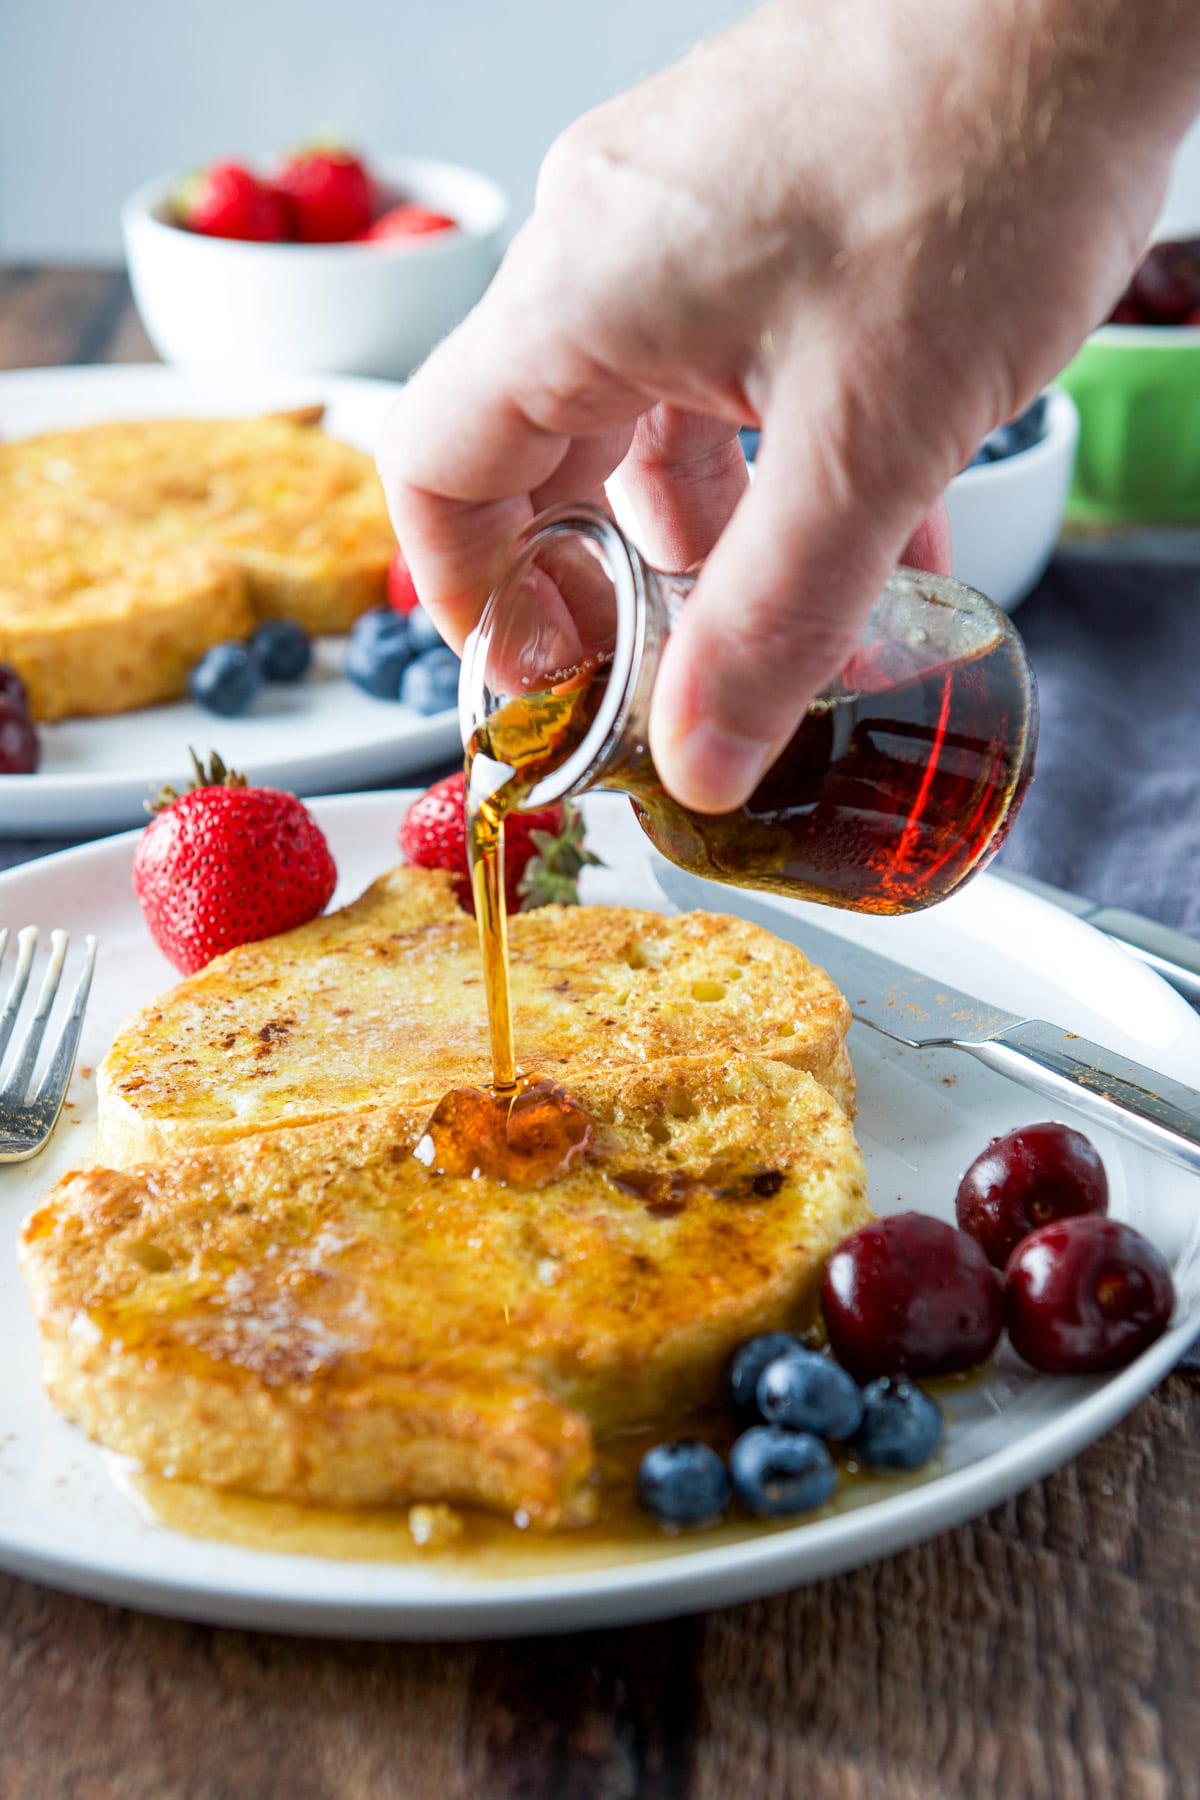
A good example of a motion photo is when you show a person pouring maple syrup on a stack of pancakes. In that example or in cocktail recipes, it is known as a pour shot. If Elaine doesn’t have access to hubby’s hands, she will try to take pour shots with her own hand.
But motion photos don’t have to be limited only to pouring something. You can sprinkle, drip, or plop ingredients to make a splash. Motion photos are fun to do.
Things to Remember When Uploading Photos
It is our belief that you should not hyperlink recipe photos; clicking your photos should not take the user to another page. This shouldn’t be a concern if you are using blocks, but if you have not made the switch yet to block style editing, you want to be sure that your photos do not hyperlink away from the post they are in.
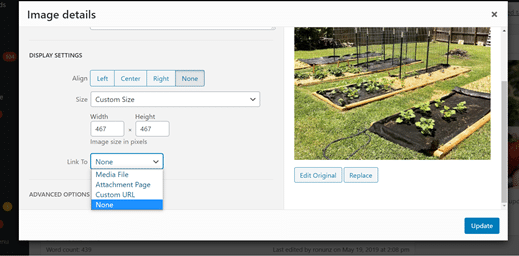
This screenshot from Beth’s son’s blog illustrates the “Link To” feature that would permit you to hyperlink a photo. Since we have both switched to Gutenberg blocks, we no longer see that option, but you may still have it on yours and we suggest you ignore it.
If you are using blocks, make sure you have uploaded the photos in the proper width for your theme, which is always a good practice Also, since photos usually default to “Large” not “Full-Size,” you will need to change them to “Full-Size”.
See the “Image Size” setting in the screenshot below for an example of what we mean.
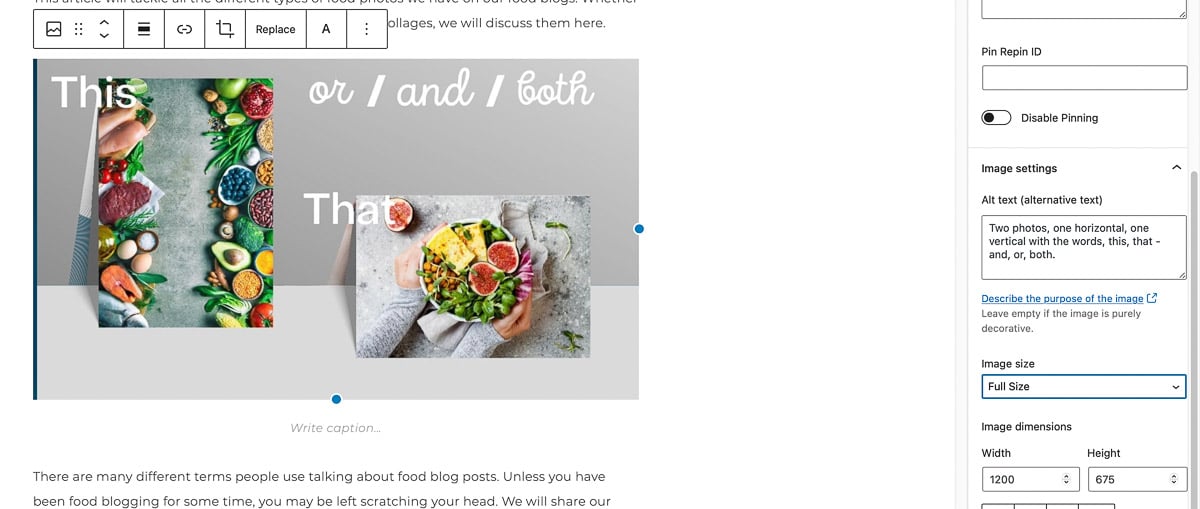
Lastly, be sure to add alt text to every image! The reason you must do this is to remain compliant with strict accessibility laws, especially the Americans With Disabilities Act (ADA). People who are sight-impaired rely on computerized reading applications to understand what the photos on your site are meant to illustrate.
We recommend you add your alt text to the photo where it is stored in your media library. That way, the alt text will be applied every time and to every location where that image is used. In the screenshot above, you can see an example of what alt text looks like in the settings bar to the right of the photo.
We hope you have found this article on the different types of food photos for food bloggers helpful. Let us know what you think by commenting below!
REMEMBER TO FOLLOW US ON SOCIAL MEDIA: FACEBOOK, TWITTER, INSTAGRAM and PINTEREST AND SHARE THIS POST WITH YOUR BLOGGING FRIENDS
SIGN UP FOR OUR NEWSLETTER AND NEVER MISS A NEW ARTICLE!

Leave a Reply